> ## Documentation Index
> Fetch the complete documentation index at: https://braintrust.dev/docs/llms.txt
> Use this file to discover all available pages before exploring further.
# Create custom views
> Help your team understand and act on traces and dataset rows faster. Describe the interface you need in natural language, and Loop generates a customizable React component you can embed anywhere.
Custom views transform complex traces and dataset rows into interfaces anyone on your team can use. Describe what you want in natural language and [** Loop**](/loop) generates an interactive React component you can customize or embed anywhere.
## Common use cases
Build custom annotation interfaces for large-scale human review tasks, surfacing only relevant information for annotators and subject matter experts.
Replace JSON with intuitive UI components like carousels, playlists, or structured summaries to make traces accessible to PMs, legal reviewers, and domain experts.
Create views that mirror your product experience:
* Playlist-style views for music applications
* Interactive source-and-answer layouts
* Custom dashboards for internal evaluations
Aggregate and display data across conversation turns to analyze dialogue flow and long-running interactions.
## Create views
To create a custom view using [** Loop**](/loop):
1. Select a trace or open a dataset row.
2. Select **Views**.
3. Describe how you want to view your data.
After [** Loop**](/loop) generates your view, refine it by describing additional changes or [edit the React component code](#edit-view-react-code) directly.
Example prompts:
* "Create a view that renders a list of all tools available in this trace and their outputs"
* "Build an interface to review each trace one by one with easy switching between traces"
* "Create a conversation-style view that highlights user messages and assistant responses"
* "Render the video url from the trace's metadata field and show simple thumbs up/down buttons"
* "Create a side-by-side view of the input and expected output"
* "Build an interface to review each row with easy switching between rows"
* "Highlight differences between the input and expected fields"
Self-hosted deployments: If you restrict outbound access, allowlist `https://www.braintrustsandbox.dev` to enable custom views. This domain hosts the sandboxed iframe that securely renders custom view code.
## Share views
Custom views are stored differently depending on whether they've been saved:
* **Unsaved views** exist only in the browser where you created them. If you close the browser, clear browser data, or switch to a different device, the view will not be available.
* **Saved views** are stored in Braintrust, versioned, and available to all team members in the project.
To save your view and share it with your team:
1. Select **Save** in the view editor.
2. Choose **Save as new view version**.
3. Select **Update** to make it available project-wide.
All team members can then use the shared view when reviewing traces or dataset rows. Custom views integrate with Braintrust workflows. Use them during [human review](/annotate/human-review), write annotations that flow into [datasets](/annotate/datasets), and combine with [Loop](/loop) for analysis.
Selecting a saved view records it in the page URL as a `tv` parameter for traces or a `dv` parameter for datasets. Copy the URL to share a link that opens that exact view, even if the project has multiple saved views. Unsaved views aren't written to the URL.
## Edit view React code
Custom views are React components that run inside Braintrust. You can edit the component code directly to customize behavior beyond what Loop generates.
To edit the React code:
1. Go to the custom view.
2. Select in the lower left of the view.
3. Select **Edit**.
Your React component receives props based on the view type:
| Prop | Type | Description |
| ------------ | -------- | ------------------------------------------------------------------------------------------------------------------ |
| `trace` | object | Contains all spans and methods for the trace. Attachment URLs in span data are automatically signed for rendering. |
| `span` | object | The currently selected span with full data |
| `update` | function | Update span metadata: `update('field', value)` |
| `selectSpan` | function | Navigate to a different span: `selectSpan(spanId)` |
The `trace` object includes:
* `rootSpanId`, `selectedSpanId` - Current span context
* `spanOrder` - All span IDs in execution order
* `spans` - Map of span\_id → span (IDs/relationships only)
* `fetchSpanFields` - Fetch full data for multiple spans (see [Access data from multiple spans](#access-data-from-multiple-spans))
| Prop | Type | Description |
| ---------- | --------- | ---------------------------- |
| `input` | object | The row's input field. |
| `expected` | object | The row's expected field. |
| `metadata` | object | The row's metadata field. |
| `tags` | string\[] | Tags applied to the row. |
| `id` | string | The row's unique identifier. |
The component can be copied and embedded in your own applications, enabling you to:
* Reuse custom views outside of Braintrust
* Integrate review interfaces into internal tools
* Build standalone annotation applications
* Create consistent review experiences across different contexts
### Add interactive controls
Custom views support interactive elements that write data back to traces. Add buttons, inputs, or custom controls to collect:
* Human review scores
* Thumbs up/down feedback
* Custom metadata fields
* Annotation notes
Use the `update` function to write metadata back to the trace. This enables annotation workflows where review and data collection happen in the same interface.
```javascript title="Example: Add thumbs up/down buttons" theme={"theme":{"light":"github-light","dark":"github-dark-dimmed"}}
function FeedbackView({ trace, span, update }) {
const handleFeedback = (isPositive) => {
update('metadata', {
...span.metadata,
user_feedback: isPositive ? 'positive' : 'negative',
reviewed_at: new Date().toISOString(),
});
};
return (
Review this output
{JSON.stringify(span.output, null, 2)}
);
}
module.exports = FeedbackView;
```
### Access data from multiple spans
By default, only the selected span has full data (input, output, expected, metadata). To access data from other spans, use `fetchSpanFields`:
```javascript theme={"theme":{"light":"github-light","dark":"github-dark-dimmed"}}
// Fetch all fields for one span
const data = await trace.fetchSpanFields(spanId);
// Fetch specific fields for multiple spans
const data = await trace.fetchSpanFields(trace.spanOrder, ['input', 'output']);
```
```javascript title="Example: Display all span inputs" theme={"theme":{"light":"github-light","dark":"github-dark-dimmed"}}
function AllInputsView({ trace, span }) {
const [spanData, setSpanData] = React.useState(null);
const [loading, setLoading] = React.useState(true);
const [error, setError] = React.useState(null);
React.useEffect(() => {
if (!trace?.fetchSpanFields) return;
trace.fetchSpanFields(trace.spanOrder, ['input'])
.then(setSpanData)
.catch((err) => {
console.error('Failed to fetch span data:', err.message);
setError(err.message);
})
.finally(() => setLoading(false));
}, [trace]);
if (loading) return
Loading...
;
if (error) return
Error: {error}
;
return (
{trace.spanOrder.map((id) => (
{JSON.stringify(spanData?.[id]?.input, null, 2)}
))}
);
}
module.exports = AllInputsView;
```
### Render attachments
[Attachments](/instrument/attachments) (images, videos, audio, and other binary data) logged in your traces can be displayed directly in custom views. When span data is fetched, Braintrust automatically converts attachment references to `inline_attachment` objects with pre-signed URLs ready for rendering.
Attachments in span data are automatically transformed into objects with this structure:
```typescript theme={"theme":{"light":"github-light","dark":"github-dark-dimmed"}}
{
type: "inline_attachment",
src: "https://signed-url...", // Pre-signed URL ready to use
content_type: "image/jpeg", // MIME type
filename: "example.jpg", // Optional filename
data?: string // Pre-fetched text content (JSON, text, CSV, XML, Markdown attachments)
}
```
The `type` field identifies the object as an attachment, `src` contains a pre-signed URL that works directly in image, video, or audio tags, and `content_type` indicates the media type.
For text-based attachment references (JSON, plain text, CSV, XML, and Markdown) that Braintrust signs on the viewer's behalf, Braintrust pre-fetches the content and populates the `data` field with the text string. Structured `inline_attachment` objects you log directly with an `http` or `data:` URL in `src` are passed through unchanged and will not have `data` populated. When `data` is present, render it directly instead of loading from `src`.
Size limits apply to pre-fetching: 1MB per individual attachment and 5MB in aggregate across the entire payload being processed. The initial custom view load signs the full `{trace, span}` object (which includes all spans in the trace), and each `fetchSpanFields` call signs all spans in that response together. Once the 5MB aggregate is reached within a single payload, remaining text attachments will have `data` omitted even if each individual attachment is under 1MB. The content is still accessible via `src` in all cases.
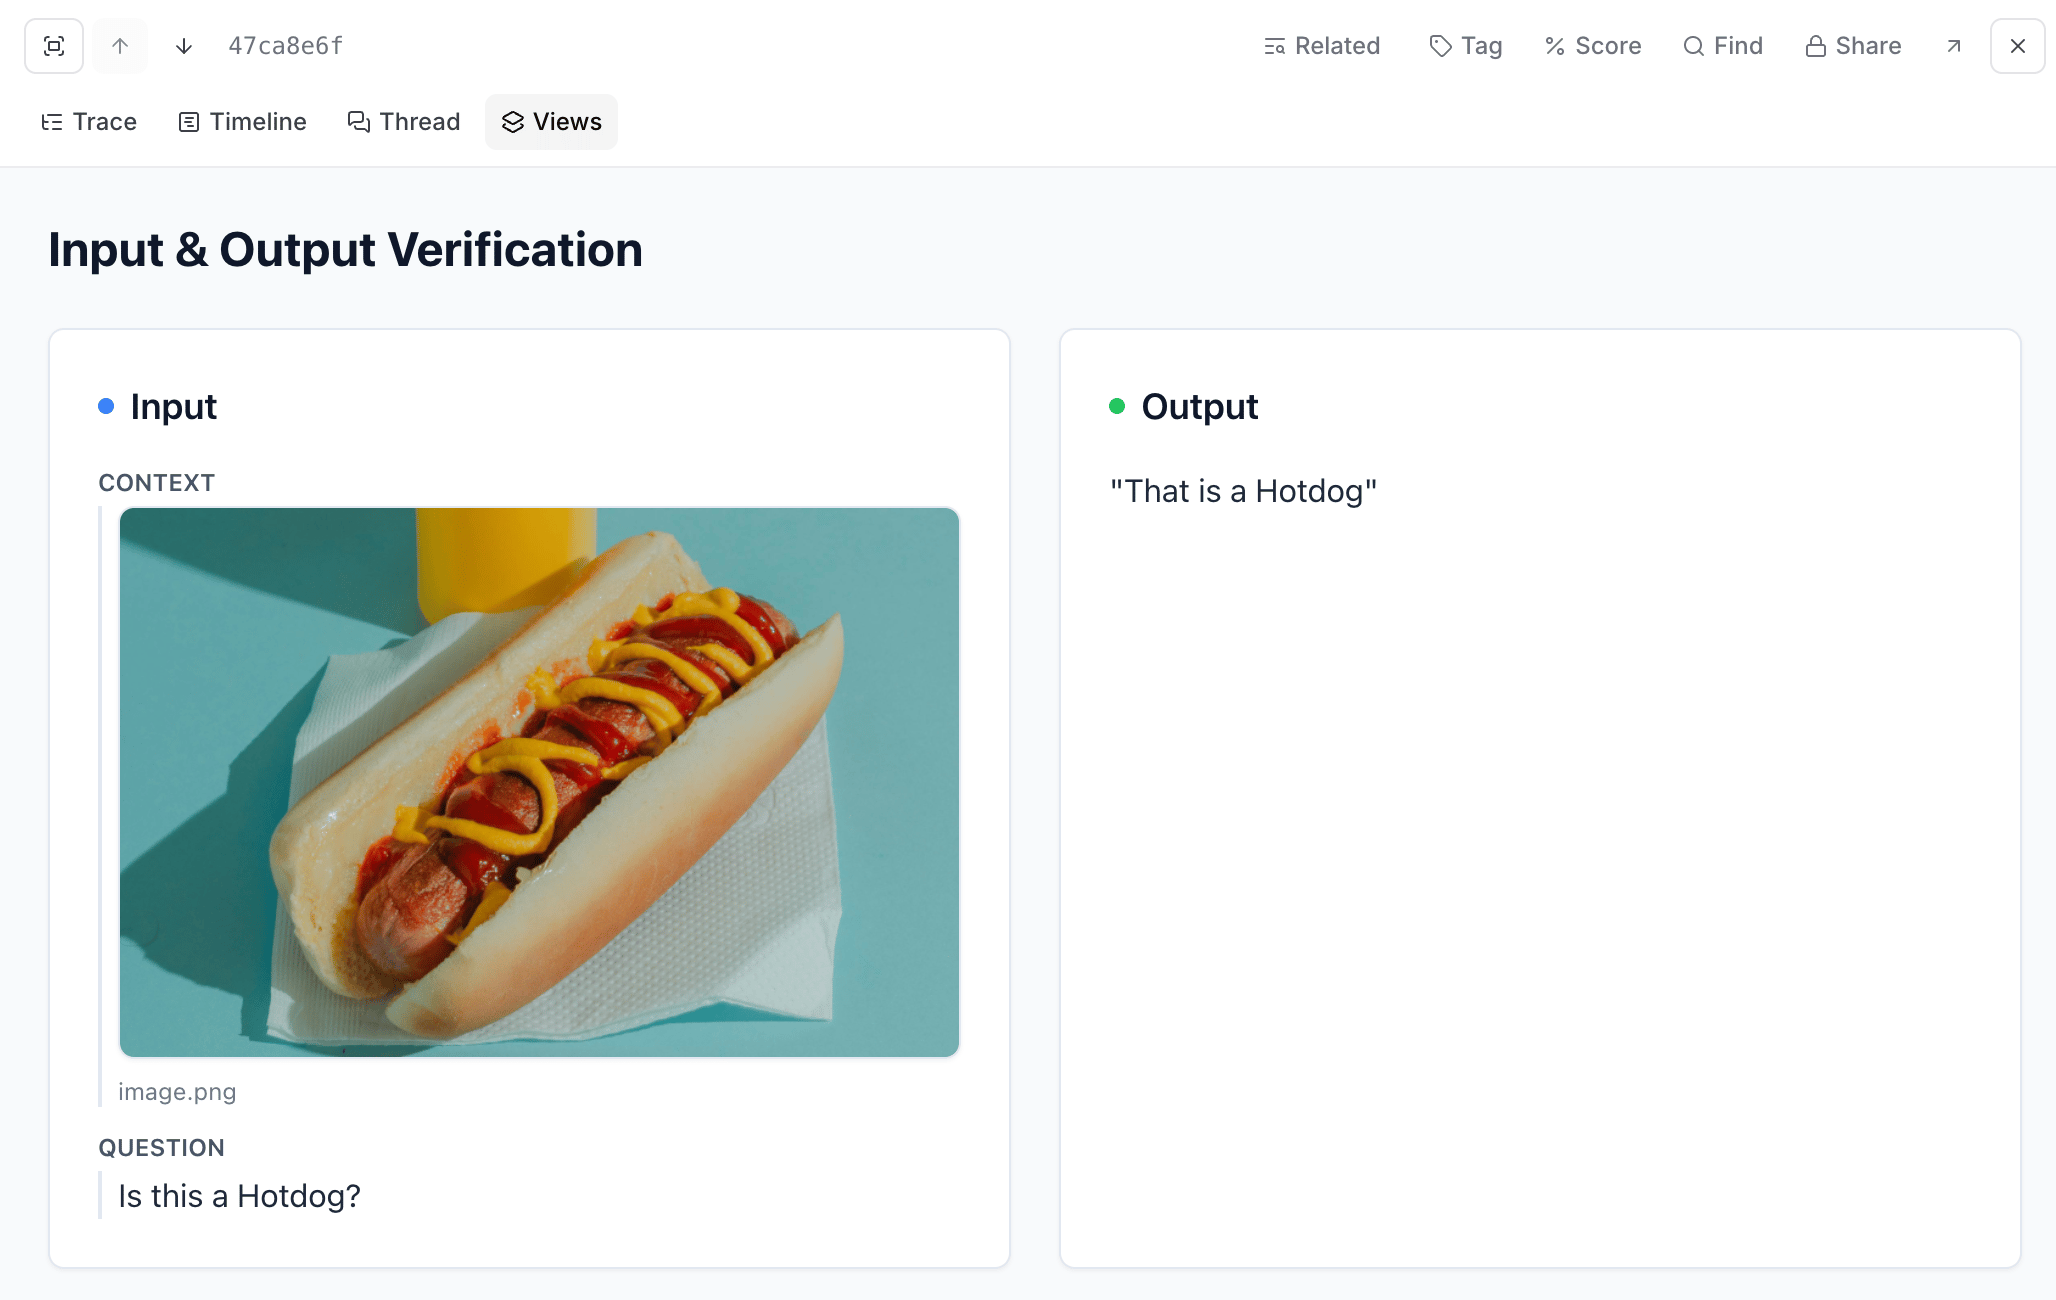
For example, the following code creates an input/output verification view that automatically detects and renders attachments alongside regular data:
```javascript title="Example: Input/output verification" expandable theme={"theme":{"light":"github-light","dark":"github-dark-dimmed"}}
function InputOutputVerification({ trace, span }) {
// Helper to check if a value is an attachment
const isAttachment = (value) => {
return value && typeof value === 'object' && value.type === 'inline_attachment' && value.src;
};
// Helper to render a value, handling attachments and regular data
const renderValue = (value, label) => {
if (!value && value !== 0 && value !== false) {
return (
No {label.toLowerCase()}
);
}
// Check if it's an attachment
if (isAttachment(value)) {
const { src, filename, content_type, data } = value;
if (content_type?.startsWith('image/')) {
return (
{filename &&
{filename}
}
);
}
if (content_type?.startsWith('video/')) {
return ;
}
if (content_type?.startsWith('audio/')) {
return ;
}
// For text-based attachments, use pre-fetched data when available
if (data !== undefined) {
const isJson = content_type === 'application/json' || filename?.endsWith('.json');
let displayText = data;
if (isJson) {
try { displayText = JSON.stringify(JSON.parse(data), null, 2); } catch (_) {}
}
return (
{filename &&
{filename}
}
{displayText}
);
}
return {filename || 'Download attachment'};
}
// Handle objects that might contain attachments
if (typeof value === 'object') {
const entries = Object.entries(value);
return (
{entries.map(([key, val]) => (
{key}
{renderValue(val, key)}
))}
);
}
// Handle strings and primitives
if (typeof value === 'string') {
return
);
}
module.exports = InputOutputVerification;
```
**Custom view PDF limitation:** PDF files referenced as `ExternalAttachment` objects cannot be rendered in custom views due to browser-level security restrictions in the sandboxed iframe environment. While images and videos work correctly, browsers block PDF rendering in this context.
To display PDFs in custom views, upload them as standard `Attachment` objects or host them externally and link to them instead of attempting inline rendering.
## Duplicate views
Duplicate custom views to reuse them across different projects or organizations. This lets you create a view once and apply the same interface across multiple projects without rebuilding from scratch.
To duplicate a custom view:
1. Open the custom view you want to duplicate.
2. Select in the lower left of the view.
3. Select **Duplicate**.
4. Give the new view a name.
5. Choose the target organization and project.
6. Select **Duplicate** to create a copy in the selected project.
The duplicated view includes all React component code and configuration, creating an independent copy you can modify without affecting the original.
## Rename views
To rename a custom view:
1. Go to the custom view.
2. Select in the lower left of the view.
3. Select **Rename**.
4. Enter a new name for the view.
5. Select **Save** to save the changes.
## Access version history
Every time you save changes to a custom view, Braintrust creates a new version with a timestamp. To view or switch between previous versions:
1. Go to the custom view.
2. Select in the lower left of the view.
3. Select **Version** to see all past versions.
4. Choose any previous version to switch to it.
The current version is marked with a **Latest** label.
## Next steps
* [Add human feedback](/annotate/human-review)
* [Build datasets](/annotate/datasets/create#promote-traces-from-logs) from annotated traces
* [Learn about Loop](/loop) for AI-assisted development